The guitars have gone from 2D to 3D... from parts to bodies. Yay!
 |
| Last look inside. It's sort of a shame nobody will ever see these fittings again. |
 |
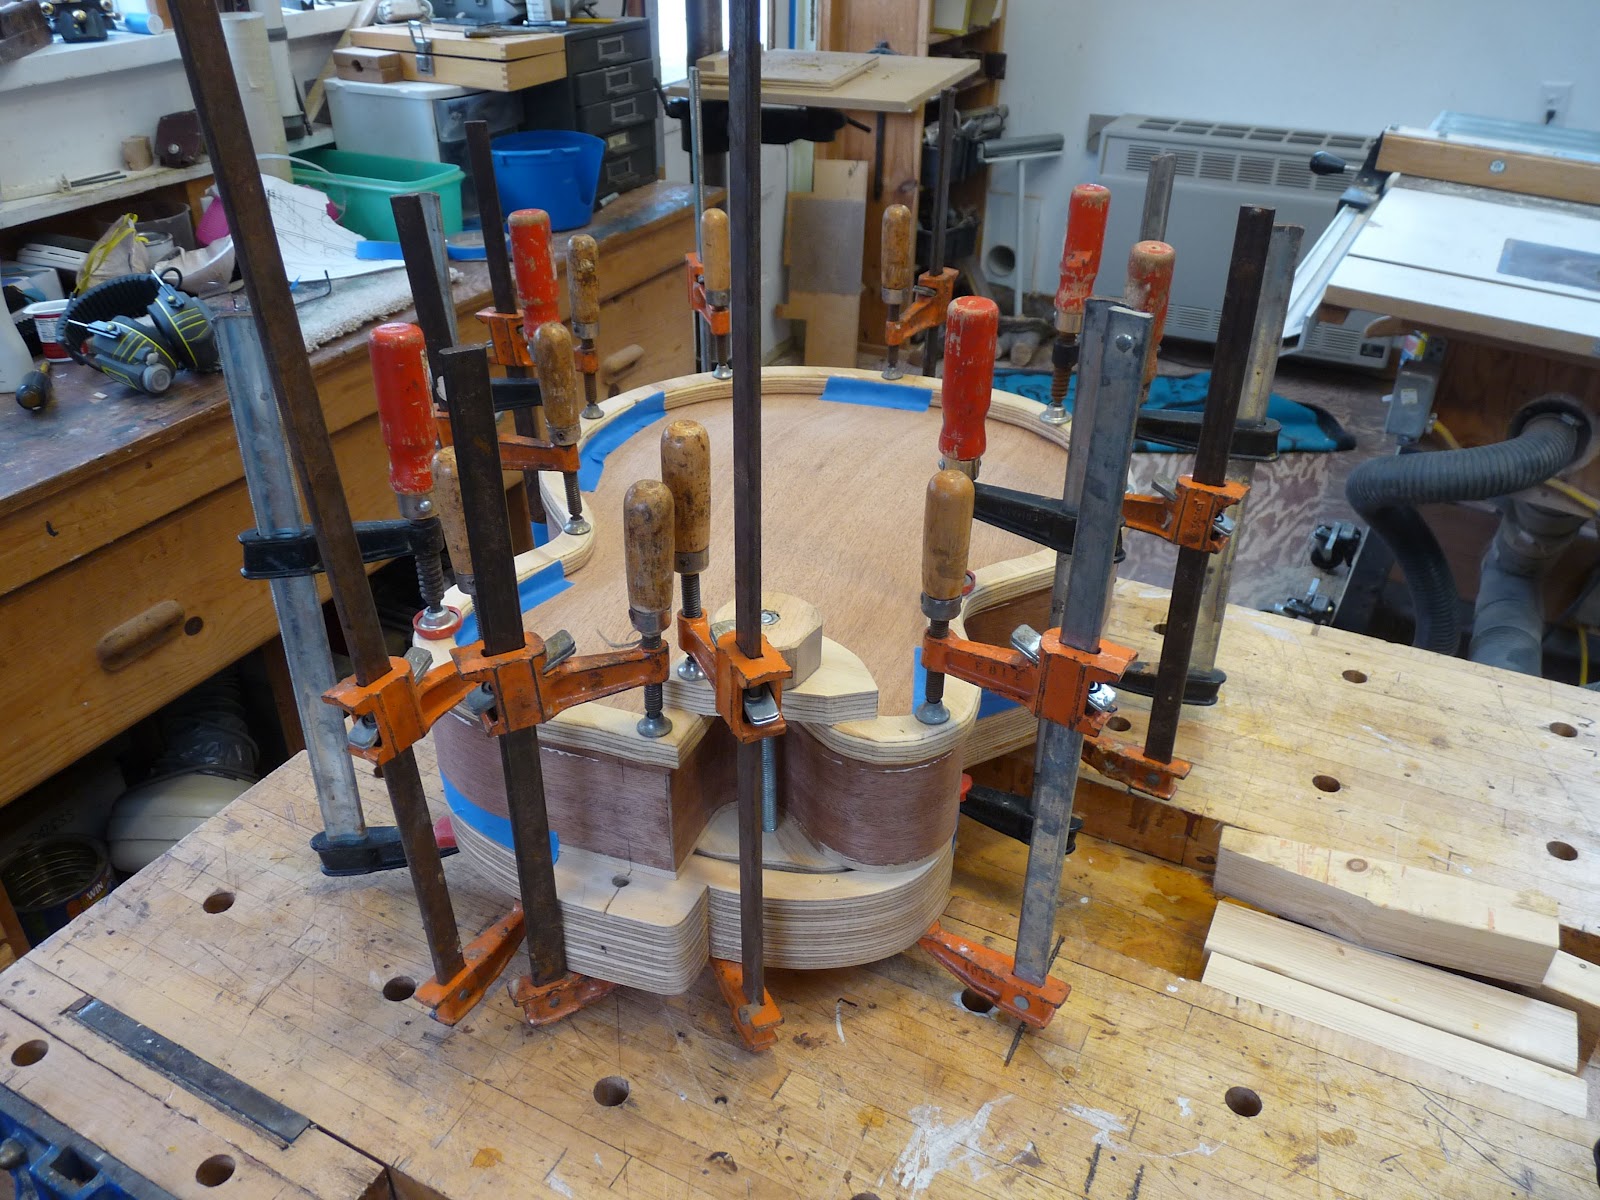
| Glueup! Top, sides, backs. TRhis was pretty frantic, working quickly to get the glue spread before the "open time" expires. I use Titebond III for this, partly because the open time is a little longer than II. For this glueup, I made a special rim-wide clamping caul, which is on the top of the sandwich, and a special little clamp to pull the cutaway area together. |
 |
| Cutaway clamp. Just some scraps of plywood, a 3/8 carriage bolt, and the hand nut from the original carving jig, which is the bottom part of the sandwich. |
 |
Sanding the sides flush and fair. The body on the right is done, the one on the left in progress. It was a full day's work to sand the sides. The sides themselves are only about 5/64ths to 3/32" to begon with, so I was really wary about using power tools here. I made up some wide sanding blocks of 100 and 150 grit paper, and carefully leveled the whole perimeter. There were lots of subtle "flat spots" from the side bending, which needed to be smoothed out - you'd see and feel them if you didn't. Also, the sides need to be perfect now because the next step - binding - requires a fair curve to follow. Both bodies turned out fine, although my arms were aching and my hands hurt.
|
 |
| Sanding the tricky part. I made several half-round sanding blocks, in different grits, to sand and fair the inside curves. Even so, it was difficult, because all the sanding had to be with the grain of the wood, although it was tempting to sort of saw away sideways in these spots. |
 |
| Congratulations, Brendan! Tag inside one of the guitars. |


I spent the last hour looking through your posts and I think your work here is fantastic! I've read the Benedetto book a couple of times over the last ten years and I really like your approach to many of the aspects of building an archtop. For example, in the book he describes drilling holes to index the contour of the top and bottom but oddly there is no full scale drilling guide, only cut outs for a couple of profiles. I wondered about routing the profiles like a "topo map" and was pleased to see that you showed that this can be done and works out well. Could you post files containing the templates for the top and bottom contours on your site?
ReplyDeleteHi Scott
DeleteThanks for your kind words about the guitar work I'm doing. Only a few people read the blog, from what I can tell, and it's nice to hear from someone other than immediate friends and family.
Bob Benedetto's book is really great - I couldn't do the guitars without it. But even more helpful is his set of plans https://www.stewmac.com/shop/Books,_plans/Plans/Benedetto_Archtop_Plans.html?actn=100101&xst=3&xsr=140915 at Stewmac, without which I wouldn't understand a lot of what he says in the book.
The plans include the full set of sections you want, both horizontal and longitudinal. They also include a lot more info about the thickness of the top and back at different locations. Like you, I read the book, but was a little annoyed at how sketchy some parts were, and especially annoyed by the "templates" in the back, which I judged as useless. It wasn't until I got the plans (and spray-mounted the two sheets front and back on a sheet of 1/4" luan) that the pieces I was missing in my head (how does the pickguard attach? What is the heel of the neck like? and a hundred others) that I got the confidence to start building without fear of running into a dead end.
I see you're a model boatbuilder. I used to be - I still have three epic functioning RC models - a Coast Guard rescue boat, a 6' racing sailboat and a harbor tug - which I built decades ago. Now that I'm retired, I'm rebuilding them one by one - the sailboat's done, tug is next. And nice work on that Harmony guitar!
More on the "sections." Contact me if you decide to go ahead with the build, and I'll lend you the masonite templates I used to make the "topo maps" when you're ready to use them. It will save you a lot of time "lofting" the dimensions from the profiles.
Not a lot of people are interested in building archtops and I'm sure this accounts for the few people visiting your site. This is a shame because the quality of your work and the way you explain it in words and photos are top notch. My blog has a wide variety of projects in it but only the pinewood derby cars generate any volume of traffic so I can sympathize with you...
ReplyDeleteThanks Bob for the offer of the templates, I will take you up on that when the time comes. I agree that lofting can be a pain!
The Harmony archtop repair is what got me thinking about building an archtop again. Did you notice that the dovetail heel joint is what failed on the Harmony? Years of string tension distorted that joint and this changed the neck/body geometry. The headstock end of the neck was now too high and this required the bridge to be lowered to make the action playable. It got to the point where the bridge couldn't be lowered any more. I don't know if the neck dovetail or the heel block of the body are to be blamed but I mention this so that you can think about this before you make your neck. My guess is that this inexpensive Harmony guitar's wood quality is to blame.
In the archtops I'm making, the neck block is a huge chunk of Hondouras mahogany, roughly 2 5/8 (height of the sides)x 2 x 3. This is to receive and hold the deep, almost full-length dovetail mortise which mates with its counterpart in the neck. And heel doesn't taper in, ether. It's an incredibly solid assembly.
DeleteFrom what I can see in the Harmony, there's just a small vertical "stick, no real block at all, unless I'm missing something. My hunch is that the sides are notched right into the heel part of the neck, and have separated in the part you tried to glue.
Were the top and back carved, or laminated?
Nice to see some discussion going on here, 95% of which I have no idea what you're talking about, but as Bob's close neighbor & friend, I visited the other day and saw his work and can honestly say it's amazing! Incredibly talented individual. (You should see the retaining wall, cabinetry & furniture he's built, among other things!)
ReplyDeleteI just discovered your blog. It's very nice work, and I look forward to your further adventures.
ReplyDeleteI lofted the plans last week but thanks for your previous offer for the templates. I think it is important to loft the plans yourself to get a feel for the geometry of the top and back. I learned one important aspect of the top arch while doing this and put it in my blog if you have any interest in seeing it.
ReplyDeletehttp://scotts-workshop.blogspot.com/2012/04/archtop-guitar-build-opening-thoughts.html
Just to add into this already existing conversation...I just found your blog tonight, Bob, after eating dinner and researching information on building an archtop. I've only been woodworking for three years (furniture and cabinetry), but have been a musician my whole life. I hope one day I will be able to produce a guitar as beautiful as your two have turned out. And thanks much for posting all of your experiences making them...I'm sure it will be most useful when it comes time for me to attempt one myself. Wish I could play one of yours!!!
ReplyDeleteThanks so much, Michael. I hope you get to build one yourself - it will really add to your woodworking skills. If you're ever planning to come to Western Massachusetts (I'm in West Whately) email me and we'll get together, maybe.
DeleteBob, at the risk of repeating myself: your guitar is phenomenal. I feel incredibly fortunate to be one of the few people who have played the instrument; to have seen a bit of the working process and then experience the finished product is a rare treat. Bravo!
ReplyDeleteHey Bob, I just found your blog while researching archtop construction. Amazing job! Thank you for taking the time to document the process and share it with the world. I just ordered the benedetto book and hoping to build my first archtop this year! . Your blog has been the most helpful and complete documentation I have found so far. Thanks so much!!
ReplyDeleteJ.
Realy nice work Bob! I´m just ahead making my own archtop. Your blog is a great help!
ReplyDelete// Jonas- Sweden